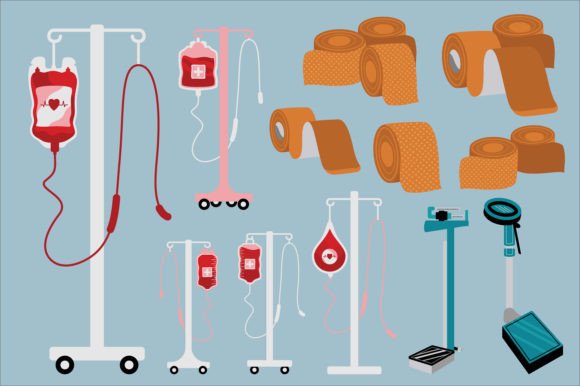
Medical Tools Collection: A Designer’s Practical Review
When I first opened the Medical Tools Collection, my immediate reaction was one of relief. As an embroidery designer who frequently works with niche themes, I have seen countless medical-themed graphics that are either too cartoonish for professional branding or so intricate they become a nightmare to stitch. This set sits comfortably in the middle ground, offering clean lines and recognizable silhouettes that translate well from screen to fabric. It is not just a bundle of clip art; it feels like a curated toolkit for creators building identity around healthcare, wellness, and clinical professionalism.
First Impressions and Visual Personality
The mood of this collection is calm, precise, and trustworthy. The shapes are simplified without losing their essential character. A stethoscope is immediately identifiable, as are the syringes, pills, and heart monitors. For an embroidery project, this clarity is vital. When you reduce a complex illustration down to thread on fabric, fine details often disappear. The Medical Tools Collection seems designed with this limitation in mind. The layout of each element allows for adequate spacing, which prevents the dreaded "thread mush" that occurs when satin stitches overlap too closely.
Visually, these graphics lean towards a modern, flat design aesthetic. This is beneficial for embroidery because it reduces the need for excessive shading or gradient fills, which can look messy on textured fabrics. Instead, the design relies on solid shapes and clear outlines. This makes it versatile for various applications, from a subtle chest logo on a nurse’s scrub top to a bold statement on a tote bag.
Real-World Application: The Custom Tote Bag Test
To truly evaluate a design, I believe in putting it through a real-life scenario. Recently, I was commissioned to create a set of promotional items for a local community health clinic. They wanted something approachable yet professional for their volunteer appreciation gifts. I chose to use elements from the Medical Tools Collection for a custom embroidered tote bag design.
I selected a sturdy cotton canvas bag, which provides a stable surface for stitching. I picked three distinct icons from the set: a heart rate line, a simple pill capsule, and a cross. Using a medium-weight stabilizer, I hooped the fabric and ran a test stitch. The result was impressive. The running stitch used for the heart rate line was crisp and did not pucker the fabric. The fill stitch on the pill capsule was dense enough to cover the canvas texture but not so heavy that it distorted the bag’s shape.
This experience highlighted why this collection works for small business merchandise. It is not overly decorative, which means it appeals to a broad demographic. Whether you are an Etsy seller creating personalized gifts for nursing graduates or a boutique owner branding aprons for a pharmacy shop, these designs hold up under scrutiny. They look intentional and high-quality, which builds customer trust.
Navigating Fabric and Hoop Constraints
While the collection is robust, it is not without its limitations. As with any machine embroidery design, context is everything. I would advise caution when using the more detailed elements on stretchy fabrics like jersey knits for baby embroidery or athletic wear. Without a proper cut-away stabilizer, the tension from the fill stitches could cause the fabric to ripple. For such projects, I recommend scaling down the design or choosing elements with more open space, relying on running stitches rather than dense satin stitches.
Similarly, consider your hoop size. If you are working with a small 4x4 inch hoop, some of the larger composite images in the collection may need to be broken apart. Trying to cram a complex arrangement into a tiny space will compromise stitching clarity. Always check the dimensions of the individual graphics against your available hoop size before finalizing your digitizing settings. For curved surfaces like caps, the simpler icons work best. A bulky, multi-layered design will not sit flat on a structured cap front, leading to distortion and poor wearability.
Enhancing Brand Consistency and Value
For creative entrepreneurs and digital product sellers, consistency is key. The Medical Tools Collection offers a cohesive visual language. When you use these Illustrations across different mediums—such as Instagram posts, banners, and physical embroidered products—you create a strong brand identity. A customer who sees your digital mockups and then receives the finished product will recognize the same clean, professional aesthetic. This continuity enhances the perceived value of your handmade product.
Moreover, these graphics are excellent for creating printable mockups. Before you commit to stitching a dozen sweatshirts, you can place these vector-style graphics into your design software to visualize color combinations. Testing thread colors digitally saves time and materials. I often test designs in black and white first to ensure the contrast is sufficient. If a design looks good in monochrome, it will likely look great in color. This collection passes that test with flying colors, maintaining its integrity even when stripped of hue.
Practical Notes for the Embroidery Designer
Before you dive into commercial embroidery projects with this set, keep these practical tips in mind:
- Test on Scrap Fabric: Always run a test stitch on the same type of fabric you plan to use for the final product. This helps you adjust tension and density.
- Check Thread Contrast: Medical themes often use blues, greens, and whites. Ensure your thread colors stand out against the fabric background. On dark fabrics, consider using a lighter underlay or adjusting the stitch angle.
- Review Stitch Density: While the collection is optimized, always inspect the digitizing file. Look for areas where stitches might overlap unnecessarily, which can cause thread breaks.
- Confirm Licensing: If you plan to sell finished items or use these as part of a digital product, verify the license terms provided with the download. Most commercial embroidery files allow for physical sales, but restrictions may apply to digital redistribution.
- Use Proper Stabilizer: Match your stabilizer to your fabric. Woven stabilizers for wovens, cut-away for knits. This is crucial for maintaining the shape of the medical icons.
Final Verdict
The Medical Tools Collection is a reliable asset for any designer working in the healthcare or wellness niche. It bridges the gap between digital Illustrations and tangible Graphics, offering designs that are both visually appealing and technically sound for embroidery. Whether you are creating holiday embroidery for hospital staff, custom apparel for a medical conference, or unique patches for a nursing school club, this collection provides the flexibility and professionalism needed to succeed. It respects the constraints of the embroidery machine while delivering a polished, modern look that customers appreciate. For those looking to elevate their craft business with high-quality, relevant design assets, this set is worth adding to your library.